|
Installing Rubber Stall Mats For Your Horse Stalls?
What You
Need to Know About Stall Preparation
 |
by Tonia Frenzel
If you have made the decision to use Rubber Stall Mats in your horse stalls, then you've made a good choice. Rubber Stall Mats reduce
bedding costs, save you time spent mucking your stalls, and ensure that your horses are safe and comfortable. The mats can be placed over
concrete, asphalt, wood, or any level well-compacted surface. If you do not have concrete, asphalt, or wood, then the sub-surface
preparation is the most important factor in having a safe, low maintenance, trouble-free stall.
Placing the mats over sand can cause problems; sand can shift under the mats, causing low spots that can create a trip hazard; or the horse
will find those low spots and pull the mats up. An alternative to concrete, asphalt, or wood is crushed fines.
Most common types are limestone or granite fines. These are easy to work with, compact well, provide good drainage, and stand up well to
freeze/thaw conditions. Below are some excellent tips on how to prepare a stall using crushed granite fines.
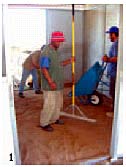 The first thing you need to do is clean the existing stall surface of any old bedding. The first thing you need to do is clean the existing stall surface of any old bedding.
The fines you use should not exceed 1/8" in size. Fines should be installed to a depth of 4 to 5 inches, which may
require excavating some of the existing material to maintain current stall elevations. 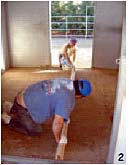 Once you fill the stall base, use a 3/4" board (or whatever the mat thickness is) to ensure you have the correct level for the stall. Once you fill the stall base, use a 3/4" board (or whatever the mat thickness is) to ensure you have the correct level for the stall.
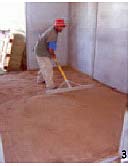
Next you need to level and tamp the fines.
Use water to soak the material aiding in the compaction process. This will create a solid subsurface that will not shift under the mats and will also provide good drainage.
Now that the subsurface is level and compacted, let it dry and you are ready to install the mats. As stat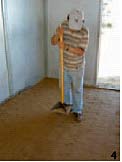 ed in our previous article, you can go with straight edge or interlocking mats, but if you do not have
concrete or asphalt, straight edge mats can shift and the horse will dig holes. ed in our previous article, you can go with straight edge or interlocking mats, but if you do not have
concrete or asphalt, straight edge mats can shift and the horse will dig holes.
You will then have to pick up the mats to fill holes. 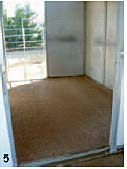 Interlocking mats are the best choice when working with limestone or granite fines as your subsurface. Interlocking mats are the best choice when working with limestone or granite fines as your subsurface.
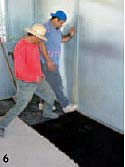 The last photo shows how to place the interlocking mats in the stall.
Start at one corner of the stall and fit pieces together like a puzzle, once the interlock is started, you can walk over them to fit in place. Because rubber can expand and contract, we
recommend you leave 1/4" to 1/2" between the edge of the mat and the stall wall. When all the mats are interlocked
together, it acts as a solid floor that will not shift, and interlocking seams will not separate.
Once you've installed the mats, add a small amount of bedding and your horse can enter its new home.
You will spend less time mucking the stall and more time enjoying your horse.
Humane Manufacturing, LLC, writer of the above article has made quality products since 1907 and has over 30 years of mat making experience. Creators of LOKTUFF interlocking flooring, we provide matting solutions for Stalls, Aisle Ways, Wash Bays, Walker Floors,
Trailer Floors, Foaling Stalls and more!
|